Winter Day Hiking for Beginners: How to Layer Your Clothes, Pack Smart and Stay Safe on Cold, Snowy Trails
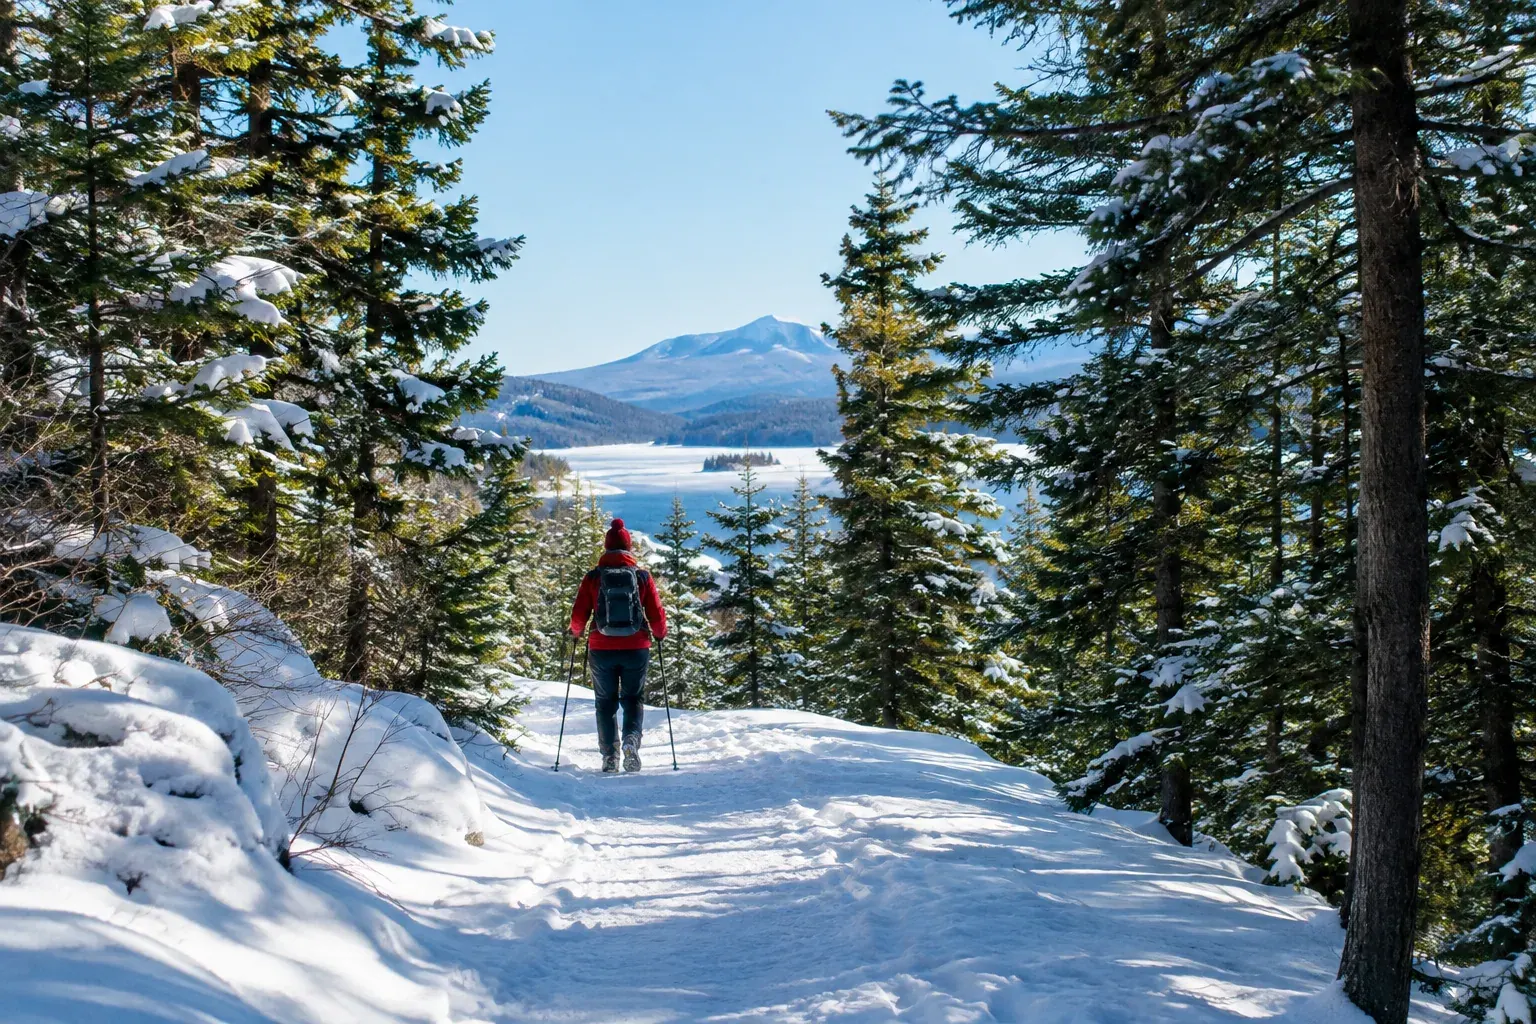
Winter trails are quiet, clear of bugs and often stunning. They also leave less room for mistakes. Here is how to dress, pack and plan so a cold day stays a good one.
Key takeaways
- Dress in three adjustable layers (base, insulation and shell) and avoid cotton next to your skin.
- Start slightly cool, then add or remove a layer before you sweat or shiver, not after.
- Microspikes handle packed snow and ice; snowshoes are for deep, soft snow.
- Plan around short daylight with a firm turnaround time, and always pack a headlamp.
- Shivering, clumsiness and confusion are early signs of hypothermia: stop, add layers, eat and head back.
In this guide
- Choose the Right Trail for Your First Winter Hike
- Dress in Layers You Can Adjust
- Keep Your Feet and Hands Warm and Dry
- Pick the Right Traction for Snow and Ice
- Pack the Winter Essentials
- Plan Around Short Days and Leave a Trip Plan
- Recognize and Prevent Cold Injuries
- Common Mistakes to Avoid
- The Bottom Line
A winter hike can be the best walk of the year: no crowds, no mosquitoes, long views through bare trees and the hush that comes with fresh snow. Many trails that feel busy in July are nearly empty in January.
Cold weather does change the rules, though. Sweat that is harmless in summer can chill you fast, daylight runs out early, and an icy patch or a twisted ankle matters more when you cannot stay warm while you wait. This guide covers how to layer, what to wear on your feet, which traction to use, what to pack and how to plan a safe first outing.
Choose the Right Trail for Your First Winter Hike
Start with a trail you already know from warmer months, or a well-marked, popular route of 2 to 5 miles with modest elevation gain. Snow makes every mile slower and harder. A pace of 2 miles per hour in summer may drop to 1 to 1.5 miles per hour on unbroken snow.
Before you go, check three things:
- The forecast. Look at the National Weather Service forecast for the trail’s elevation, not just the nearest town. Note the temperature, wind chill, wind speed and any winter storm watches or warnings.
- Trail conditions. Call the ranger station or check the park, state forest or land manager’s current conditions page. Recent trip reports from other hikers can tell you whether the trail is packed, icy or buried.
- Access. Some park roads and trailhead lots close or go unplowed in winter. If the drive involves mountain roads, read our guide to winter driving safety and check chain or traction rules for the area.
In many states, firearm deer seasons run into late fall and early winter. If you hike on public land where hunting is allowed, wear a blaze orange hat or vest, and dress your dog in orange too.
Safety note: In mountain terrain, avoid open slopes steeper than about 30 degrees, gullies and the runout zones below them, especially after new snow or wind. Check your regional avalanche center’s forecast, and stick to low-angle, forested trails until you have avalanche training.
Dress in Layers You Can Adjust
The goal in winter is not to be as warm as possible. It is to stay dry. Sweat soaks your clothing on the climb, then chills you the moment you stop. A layering system lets you match your clothing to your effort.
| Layer | Job | Good materials | Avoid |
|---|---|---|---|
| Base layer | Moves sweat away from your skin | Merino wool, polyester or other synthetic blends | Cotton, which stays wet and cold |
| Mid layer | Traps warm air | Fleece, wool sweater, light synthetic puffy | Heavy cotton sweatshirts |
| Insulated jacket | Keeps you warm when you stop | Down or synthetic puffy that fits over other layers | Leaving it at home because you feel warm at the trailhead |
| Shell | Blocks wind, snow and rain | Waterproof breathable or wind-resistant jacket and pants | Plastic ponchos that trap sweat |
For your legs, synthetic or wool base-layer tights under hiking pants work for most conditions. Add waterproof shell pants for deep snow, wet snow or strong wind. Jeans are a poor choice because denim soaks up snow and dries slowly.
Start cool and adjust early
A common rule among winter hikers is “be bold, start cold.” If you feel comfortably warm while standing at the trailhead, you will likely be sweating within 10 minutes of climbing. Start slightly chilly, then adjust.
- Take off a layer or open zippers as soon as you start to feel warm, before you sweat.
- Put your insulated jacket on the moment you stop for more than a few minutes, even if you feel fine.
- Pull a hat on and off as a quick thermostat. Your head and neck lose heat fast when exposed.
Typical outfits by temperature
| Conditions | What many hikers wear while moving | Carry in the pack |
|---|---|---|
| 35 to 45 degrees F, wet | Light base layer, light fleece, waterproof shell | Dry gloves, extra socks, light puffy |
| 20 to 35 degrees F | Midweight base layer, fleece, wind shell, light gloves, hat | Insulated jacket, warmer mittens, neck gaiter |
| 0 to 20 degrees F | Midweight base layers top and bottom, fleece, shell, warm hat | Heavy puffy, mittens, face cover, goggles in wind |
| Below 0 degrees F or strong wind | Best saved for experienced hikers with full winter gear | Expedition-weight insulation and a plan to turn back early |
Bodies vary, so treat this as a starting point. Note what works on each hike and adjust next time.
Keep Your Feet and Hands Warm and Dry
Cold feet and hands end more winter hikes than anything else.
Boots. Waterproof hiking boots work well for short hikes on packed trails. For deep snow or temperatures in the single digits, insulated winter boots are warmer. Leave a little wiggle room for your toes, because tight boots restrict blood flow and make feet colder.
Socks. Wear wool or synthetic socks, never cotton. Carry a dry spare pair in a plastic bag. Thick socks only help if your boots still fit comfortably over them.
Gaiters. Ankle or knee-high gaiters keep snow from packing into the tops of your boots and soaking your socks.
Hands. Use a two-part system: thin liner gloves for dexterity while moving, plus warm mittens or insulated gloves for breaks and wind. Mittens are warmer than gloves because your fingers share heat. Carry a spare pair of gloves, since the first pair often gets damp. Chemical hand warmers are cheap insurance on very cold days.
Pro tip: Put your next layer on before you need it. If your fingers are already numb, they will struggle with zippers, buckles and snacks.
Pick the Right Traction for Snow and Ice
Ordinary boot soles slide on packed snow and ice. The right traction device prevents the falls that cause most winter hiking injuries.
| Trail condition | What to use | Notes |
|---|---|---|
| Bare or lightly dusted trail | Boots with good lugs | Watch for black ice on rocks and boardwalks |
| Packed snow, icy patches, frozen footprints | Microspikes (slip-on chains with short spikes) | The most useful winter item for most day hikers |
| Deep, soft snow, roughly a foot or more | Snowshoes | Prevent sinking and protect the trail for others |
| Steep, hard snow or ice in the mountains | Crampons and an ice axe | Require training; not for beginner day hikes |
Simple coil-style ice cleats meant for sidewalks can work on flat, icy paths but often slip off or break on uneven trails. Microspikes stay on better and grip on slopes.
On popular trails, wear snowshoes when the snow is deep and soft. Walking in boots alone leaves deep holes, called postholes, that freeze into ankle-twisting traps for the next hiker. Also stay off groomed cross-country ski tracks unless the trail rules say otherwise.
Many outdoor gear shops and some parks rent snowshoes and microspikes by the day, which lets you try them before you buy.
Pack the Winter Essentials
A winter day pack carries more than a summer one because you need to be able to stay warm if something goes wrong. Start from the classic Ten Essentials and add winter extras.
- Navigation. A map and compass or a downloaded offline map on your phone. Snow can bury trail markers and footprints, so do not rely on following a beaten path.
- Headlamp with fresh batteries. Lithium batteries hold up better in cold.
- Insulation. An insulated jacket, extra hat, spare gloves and dry socks.
- Sun protection. Sunglasses or goggles and sunscreen. Snow reflects sunlight and can cause sunburn and snow blindness, even on cold days.
- Food. More than you think. You burn more calories in the cold. Choose snacks that do not freeze hard, such as nuts, trail mix, cheese and chocolate.
- Water. At least 1 to 2 liters in insulated bottles. Cold air is dry and you lose fluid through breathing, even if you feel less thirsty.
- First aid kit, plus blister care and any personal medications.
- Fire starter and a knife or multitool.
- Emergency shelter. A lightweight emergency bivy or space blanket and a foam sit pad to keep you off the snow.
- Phone and power bank. Cold drains batteries quickly. Keep the phone in an inside pocket close to your body, and carry the power bank there too.
A thermos of hot tea, soup or cocoa is the best morale boost on a cold day, and it warms you from the inside.
Plan Around Short Days and Leave a Trip Plan
In December, the sun sets around 4:30 p.m. in much of the northern United States, earlier in deep valleys and on the east side of mountains. Darkness brings colder temperatures, and finding a snowy trail by headlamp is hard.
- Start early. Aim to be walking by midmorning at the latest.
- Set a turnaround time. Pick a time to head back no matter where you are, and allow more time for the return if you will be tired or the light will fade.
- Leave a trip plan. Tell a friend or family member your trailhead, route, the time you expect to be out and when they should call for help. A simple text works.
- Know your signal situation. Many trails have no cell coverage. A satellite messenger or personal locator beacon adds a layer of safety for remote hikes.
Getting outside during the brightest part of the day has a bonus, too: midday daylight is one of the simplest tools for beating the winter blues.
Recognize and Prevent Cold Injuries
Frostbite and hypothermia usually develop gradually, which means you can catch them early. Watch yourself and your companions.
Frostbite most often affects fingers, toes, ears, the nose and cheeks. The first stage, often called frostnip, causes redness, tingling and numbness. Skin that turns white or grayish-yellow, or feels firm or waxy, is a warning sign of deeper frostbite. At wind chills around minus 20 degrees F, exposed skin can freeze in roughly 30 minutes, according to the National Weather Service. Cover exposed skin, and warm cold areas against your body, such as fingers in your armpits. Do not rub frostbitten skin or rewarm it if it might freeze again before you get out.
Hypothermia happens when your body loses heat faster than it makes it. Early signs are intense shivering, fumbling hands, stumbling and irritability or poor judgment. Hikers sometimes summarize this as the “umbles”: stumbles, mumbles, fumbles and grumbles. If you notice these signs, stop, get out of the wind, add dry layers, eat and drink something warm and sweet if possible, and head back.
Safety note: Confusion, slurred speech, extreme drowsiness or shivering that stops while the person is still cold are signs of severe hypothermia and a medical emergency. Call 911 if you have a signal, insulate the person from the ground, protect them from wind and handle them gently while you wait for help. Seek medical care for any frostbite with blistering, hard skin or lasting numbness.
People with heart or lung conditions, diabetes, Raynaud’s phenomenon or circulation problems should talk with their doctor before hiking in severe cold. If you are new to regular exercise, building a base with a beginner walking routine first makes winter trails much more enjoyable.
Common Mistakes to Avoid
- Wearing cotton. Jeans, cotton T-shirts and cotton socks hold moisture and chill you.
- Overdressing at the start. Sweating early leaves you wet and cold later.
- Skipping traction. A packed trail can be glare ice under a light layer of snow.
- Underestimating time. Snow slows you down, and darkness comes early.
- Letting water and snacks freeze. Keep bottles insulated and snacks in an inner pocket.
- Not eating or drinking. Low energy and dehydration make you colder.
- Pushing past the turnaround time. The summit or the waterfall will be there next weekend.
- Hiking without telling anyone. A trip plan is free and can save hours in an emergency.
The Bottom Line
A good winter day hike starts with a modest trail, a careful look at the forecast and conditions, and a layering system you adjust before you sweat or shiver. Add the right traction, warm and dry feet and hands, and a pack with extra insulation, food, water and a headlamp.
Set a turnaround time, leave a trip plan, and watch for the early signs of frostbite and hypothermia in yourself and others. With those habits in place, cold and snow become the best part of the hike instead of the biggest risk.
Frequently asked questions
What temperature is too cold for a beginner to hike?
There is no single cutoff, because wind, wet snow and your clothing matter as much as the thermometer. Many beginners do well on short, familiar trails down into the teens, with good layers and traction. Check the wind chill in the National Weather Service forecast, and pick a shorter route or another day when it falls near zero or below.
Do I need special boots for winter hiking?
For short hikes on packed trails, waterproof hiking boots worn with warm wool socks are usually enough, as long as they are not laced so tight they cut off circulation. For deep snow or very cold days, insulated winter hiking boots keep your feet warmer. Gaiters help keep snow out of the tops of any boot.
Are microspikes worth buying if I only hike a few times each winter?
If your trails freeze and thaw, often yes. Packed, icy trails are where most winter hiking falls happen, and a basic pair of microspikes often costs around $40 to $80. Some outdoor stores also rent them along with snowshoes.
How do I keep my water from freezing?
Use an insulated bottle or wrap a regular bottle in a spare sock, and carry it inside your pack rather than in an outside pocket. Store it upside down, since ice forms at the top first. Hydration bladder hoses freeze quickly, so blow the water back into the reservoir after each sip or leave the bladder at home.
Is it safe to hike alone in winter?
It carries more risk than in summer, because a minor injury can turn serious when you cannot keep warm while waiting for help. If you go alone, choose a popular, well-marked trail, leave a detailed trip plan with someone, carry extra insulation and consider a satellite messenger where there is no cell signal.