Getting Started With Geocaching: Essential Tips for Your First Adventure
Geocaching turns a walk into a small treasure hunt. Learn how to choose a beginner-friendly cache, find it with your phone and follow the rules along the way.
Key takeaways
- Start with a traditional cache rated 1 to 2 for both difficulty and terrain, then check the listing and recent logs.
- Use a geocaching app to view coordinates, clues, access details and cache attributes. Download information before you lose service.
- Bring water, a charged phone, a pen and a small flashlight. A GPS receiver is optional for your first outing.
- Sign the physical log, return the container as found and trade items only when you can leave something of equal or greater value.
- Check land rules, weather and access before setting out, and keep children close near roads, water and steep or uneven ground.
In this guide
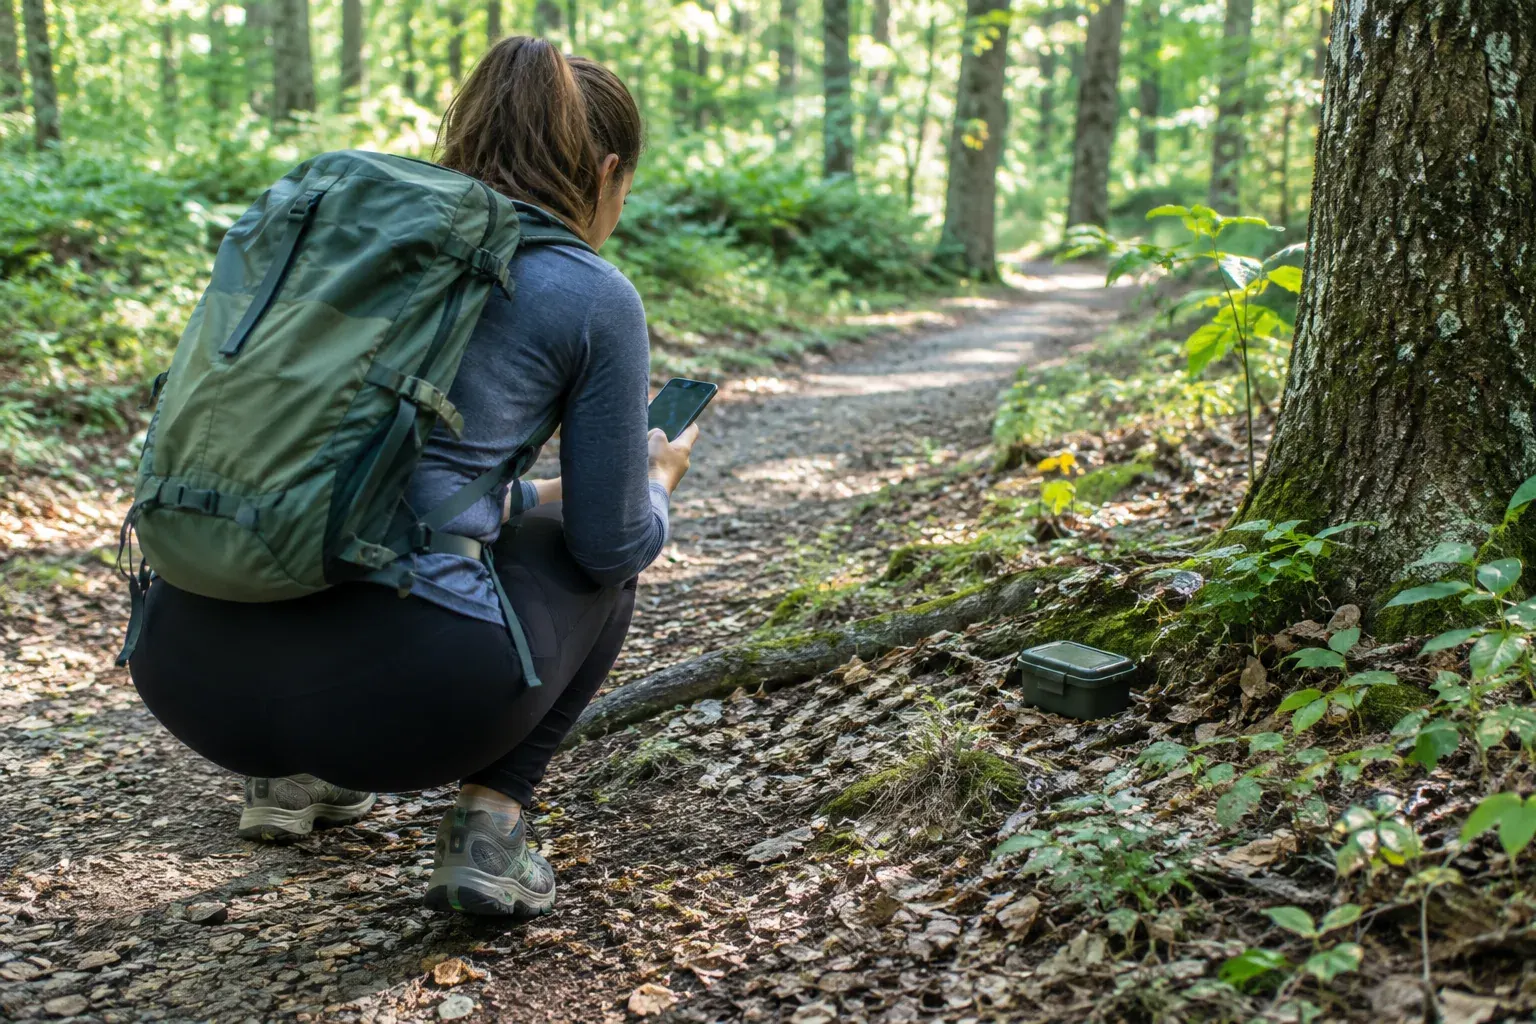
Geocaching is an outdoor treasure hunt: you use GPS coordinates and clues to find a container hidden by another player. The container may hold a logbook, small trade items or just a log, and the fun is often in the search as much as the find.
For your first outing, choose a straightforward cache in a place you are allowed to visit, bring a few practical supplies and take your time. This guide explains how to use an app or GPS receiver, read difficulty and terrain ratings, search respectfully and make the activity work for families.
What geocaching is and how a find works
A cache listing gives you coordinates, a description and often hints about the hiding place. Many caches are small containers tucked near a trail or public feature. Others are larger, or require solving a puzzle or visiting more than one location.
When you find a cache, open it carefully, sign the paper log if it has one, and put everything back where and how you found it. Then log your find in the app or website used for the listing. If you do not find it, record a DNF, meaning did not find. That helps the cache owner and gives other players useful context.
Cache listings also identify the cache type. For a first trip, a traditional cache is usually simplest because the listed coordinates point to the container. Mystery or puzzle caches may require you to solve something first, while multi-caches send you to several stages. Save those for when you know what you enjoy.
Good to know: Not every cache has trade items, and some containers are too small to hold anything besides a log. Read the listing rather than expecting every find to be a box of prizes.
Set up your app or GPS receiver
A geocaching app is the easiest starting point for most people. Use a service that provides current listings, coordinates, clues, cache attributes and recent activity. You can also use a handheld GPS receiver if you prefer a dedicated device or want navigation without relying on a phone screen.
Before you leave home:
- Create an account if the listing service requires one, and check that you can open the cache details.
- Select a cache and save its coordinates, description, hint and any access notes. Download an offline map or listing if your app offers that option.
- Check your phone’s battery, location settings and map coverage. Bring a charger or power bank for a longer outing.
- Confirm the coordinate format and enter or copy the coordinates exactly if using a separate GPS unit.
GPS tells your device where you are, but it does not identify the exact hiding spot. Tree cover, buildings, terrain and device conditions can affect the position shown. Follow the app or receiver until you are close, then search the nearby area using the clue and listing details. Do not assume the container is directly beneath the pin.
Cell service and GPS are different. A phone may still receive a GPS location when you have no cellular signal, but it might not load a listing or map unless you saved the information in advance. Keep the written or saved coordinates available, and do not let a screen distract you while walking.
Choose a cache that suits your first outing
Most widely used geocaching listings show separate ratings for difficulty and terrain, commonly on a 1 to 5 scale with half-step ratings. Difficulty describes the challenge of finding the container. Terrain describes the physical conditions involved, such as a steep approach, uneven ground or a long walk. A low rating does not guarantee a smooth, accessible route, so read the description and attributes too.
| Listing detail | What it tells you | A first-trip choice |
|---|---|---|
| Cache type | Whether the coordinates lead to a container, puzzle or series of stages | Traditional |
| Difficulty | How challenging the search may be | Around 1 to 2 |
| Terrain | How physically demanding the route may be | Around 1 to 2, based on your abilities |
| Size | Whether the container may hold a log only or trade items | Small or regular, if you want to see a container clearly |
| Recent logs | Whether other players have found or reported a problem | Look for a recent, credible find and read newer comments |
For a first cache, look for a maintained public park or trail with clear access, a short approach and a description that does not depend on climbing, wading or entering dense brush. Check parking, opening hours, posted rules and the route before you go. A cache with a low terrain number may still be unsuitable for a stroller, wheelchair or anyone who needs a firm, level surface.
Ratings and descriptions are helpful, not guarantees. If a listing mentions a steep bank, a long hike, a night search or specialized equipment, pick another cache for now. Building up your walking routine can make longer cache outings more comfortable. For a gradual plan, see Walking for Fitness: How to Start and Stay Motivated.
Pack a few useful supplies and search methodically
You do not need special equipment for an easy local cache. Start with the basics, then add gear based on the route and weather:
- A charged phone, or a GPS receiver with fresh batteries
- A pen or pencil, since some cache logbooks do not include one
- Water, appropriate shoes and weather-appropriate layers
- A small flashlight for looking into a container or shaded space, not for entering a closed area
- A power bank for an outing that may drain your phone
- A small, clean trade item if the cache is large enough and you want to exchange something
- Any personal essentials, such as medication, sunscreen or insect repellent
At the destination, pause and compare the listing with what is around you. Look for a hiding place that fits the clue, but do not dismantle structures, move heavy objects or damage plants. If the GPS position seems to wander, wait briefly for a steadier reading and use the clue. Search carefully within the area a person could reasonably hide a container.
Give yourself a sensible time limit. If you have searched for a while without success, read the hint, review recent logs and make one careful pass. Then stop if the search is taking you off the permitted route or putting you at risk. You can return another day, or record a DNF and move on.
Pro tip: A cache hunt pairs well with a regular walk, but plan the route before you start. A pleasant nearby cache is a better first experience than a difficult search that leaves you rushed or tired.
Follow cache etiquette and handle trade items fairly
Geocaching depends on people returning caches in good condition and not making the hiding place obvious to passersby. Be discreet around other park visitors, but do not treat stealth as a reason to trespass or act suspiciously around restricted buildings. If someone asks what you are doing, a simple explanation is usually best.
When you find a container:
- Check that it is the listed cache, then open it gently and keep the log and contents dry.
- Sign the paper log with your geocaching name or another name you use for the hobby. Do not remove the log.
- If you take a trade item, leave an item of equal or greater value. If you have nothing suitable, enjoy the find without taking anything.
- Seal the container and return it to its original hiding place, oriented as you found it.
- Log the find online when practical. Avoid posting spoilers, photographs or details that reveal the hiding place.
Good trade items are clean, safe, durable and appropriate for the likely audience. Do not leave food, gum, liquids, scented products, sharp objects, weapons, medication or anything illegal. Never put personal details such as your address into a cache.
Some caches contain trackable items, such as a tagged object with instructions to travel between caches. These are not ordinary trade items. Read the trackable’s instructions and log its movement through the listing service, or leave it in place if you are not prepared to handle it properly.
Check land rules, safety and family needs
A place that is open to the public is not automatically open to every geocaching activity. A cache owner needs permission to place a cache, and the rules for finding one depend on the land manager. National parks, national forests, Bureau of Land Management areas, state parks and city parks can have different policies. Some allow caches under specific conditions, while others restrict them.
Before visiting, check the cache listing and the current rules from the land agency or park. Stay on open trails where required, respect closures and posted hours, and do not dig, bury a container, disturb wildlife, enter archaeological or protected sites, or touch survey markers. Avoid caches near railroad tracks, utility structures, private property or other restricted areas. If the listing appears to direct you somewhere unsafe or prohibited, do not follow it. Contact the cache owner or land manager through the available service instead.
Use the same care you would on any outdoor outing. Check the forecast and local alerts, carry water, wear shoes suited to the ground and tell someone your plan if you are heading somewhere remote. In areas with ticks, heat, wildfire risk, hunting seasons or severe weather, follow local precautions and change plans when conditions warrant. Do not rely on a phone for emergency communication where service is uncertain.
Geocaching can be a good family activity when the route and search fit the children with you. Choose a short, simple cache, explain that the container is not a toy to take home and keep children within reach near roads, water, steep slopes and parking areas. Let kids help read clues or spot likely hiding places, but an adult should manage navigation and decide when to stop.
Make the outing inclusive by checking the route details instead of relying on a rating alone. Surface, slope, gates, steps and the distance from parking can matter more than the cache difficulty number. If you want to observe the natural surroundings as you go, these wildlife photography tips offer ideas for noticing animals without disturbing them.
Common mistakes to avoid
- Choosing a cache by rating alone: Read the description, attributes, access notes and recent logs. The route may not suit you even when the number looks easy.
- Assuming the GPS pin is exact: GPS narrows the search area. Use the hint and surroundings, and avoid tearing up the landscape to find a container.
- Leaving the listing until you have no signal: Save the coordinates, directions and relevant details before you head out.
- Taking a trade item without replacing it fairly: Trade equal or better, or leave everything in the cache.
- Searching after conditions turn unsafe: Stop for bad weather, fatigue, darkness or restricted access. A DNF is better than a risky search.
- Putting a cache back somewhere else: Return it to its original position so the next visitor and cache owner can find it.
- Assuming every public site permits caches: Follow the land manager’s rules, even if the cache appears established or other visitors are present.
The Bottom Line
For a smooth first geocaching trip, choose a traditional cache with an easy route, read the listing and recent logs, and save the details before you leave. Bring water, a pen and a charged device, then search patiently and respect the land around you.
Sign the log, return the container as found and leave trade items fairly. If the cache, route or conditions do not feel safe or permitted, stop and choose another outing.
Frequently asked questions
What do I need to start geocaching?
You need a geocaching app or GPS receiver, a cache listing with coordinates and a way to sign the log, usually a pen. For a short first trip, bring water, a charged phone and shoes suited to the route.
Can I geocache with my phone?
Yes. A phone with a geocaching app can show coordinates, clues and cache details. Save the listing or map before you go, because cellular service may be limited even when the phone can determine its GPS location.
What difficulty and terrain rating should beginners choose?
A traditional cache rated around 1 to 2 for difficulty and terrain is often a manageable starting point. Read the listing and recent logs too, since ratings do not fully describe accessibility, distance or current conditions.
Can I take items from a geocache?
Only take a trade item if you leave something of equal or greater value in return. Many caches contain only a logbook, and trackable items have separate instructions and should not be treated as ordinary swag.
Is geocaching allowed in national or state parks?
Rules vary by park and land manager, and permission to place a cache is different from permission to visit one. Check the current rules for the specific location, follow closures and stay on permitted routes.